When it comes to designing a warehouse layout, small decisions can make a big difference to how efficiently a business operates. From aisle direction and zoning to forklift access and racking type, every element plays a part in how smoothly the workflow runs. With over 20 years of experience in warehouse design, Leo Kanas from Macrack shares what to consider when planning a layout that’s practical, safe, and built to grow with your business.
Where to Start When Designing a Warehouse Layout
When planning a warehouse layout, the first thing to consider is what product is being stored. If the solution requires standard pallet racking, the layout requirements become clear quickly. From experience, longer aisles tend to make the overall space more efficient. It’s best to have the aisles running toward the roller doors so forklifts can move straight out of the racking, pick goods, and drive directly to the loading area.
The racking itself is generally positioned toward the back of the warehouse, with a staging or dispatch area at the front. This makes daily operations smoother; goods can be picked, stored in the dispatch area, and loaded as soon as the trucks arrive. For larger sites, drive-under bays can also be added to allow forklifts to pass beneath the racking and create additional access lanes.
When a production or manufacturing area is part of the operation, it should sit adjacent to the racking, not in front of it. Production takes up a lot of room and brings people into the space, so keeping it separate from forklift areas is essential for both efficiency and workplace safety.
The Importance of Zoning
Many warehouse managers overlook zoning when planning their layout at the start. While not a racking requirement, zoning is a critical part of warehouse efficiency. It’s about understanding how the business operates as a whole; where goods come in, where they go out, and what happens in between.
Consider whether the warehouse needs areas for dispatch, goods-in, packing, or manual handling. Are there awnings for trucks to unload when it rains? Is there a space for breaking down large packs or repacking smaller items? Addressing these questions early avoids running out of room later.
A well-zoned warehouse operates as one cohesive system rather than a collection of separate parts. This is where experience makes a big difference, understanding how businesses run day to day allows for better, more practical design decisions.
Designing Around Material Handling Equipment
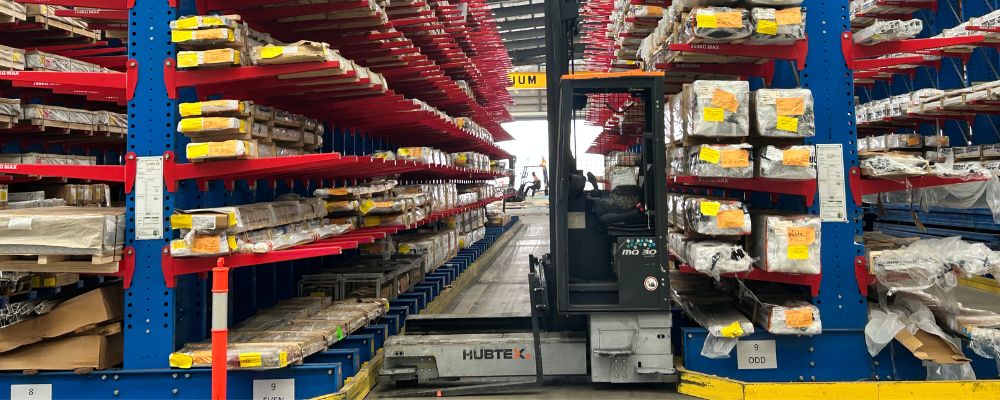
The type of forklift or material handling equipment (MHE) in use plays a major role in layout design. Standard gas ride-on forklifts generally require around a 4-metre aisle, while smaller electric units can operate in 3.5-metre aisles. For long products such as steel, timber, or extrusions, side-loaders can reduce aisles to around 1.3 to 1.5 metres, dramatically increasing storage density.
If a business already owns forklifts, the layout can be designed to suit them. But if they’re open to change, there’s often an opportunity to gain efficiency by adjusting the type of equipment. High-reach forklifts can lift to over 10 metres, allowing racking to go higher and increasing capacity without expanding the footprint.
The goal is to find the balance between racking height, aisle width, and forklift capability, designing them in conjunction rather than as separate decisions.
Common Mistakes in DIY Layouts
Aisles that are too narrow are one of the most common and costly mistakes in self-planned warehouse layouts. Tight aisles slow down forklift movement, increase the risk of collisions, and often lead to racking damage when operators have to manoeuvre carefully in and out of storage bays. Although narrow aisles might seem like a way to gain extra storage, the resulting bottlenecks and repair costs quickly outweigh any benefit.
Another frequent issue is the use of multiple racking brands within the same warehouse. This often happens when businesses try to save money by piecing together second-hand or mismatched systems. In practice, it creates alignment problems, complicates maintenance, and can compromise both safety and efficiency. A consistent, engineered system is always the better long-term investment.
Production areas are another area where layouts commonly go wrong. When racking and production zones are placed too close together, forklifts and staff end up sharing the same space. This not only disrupts workflow but also creates serious safety risks. Keeping clear separation between pedestrian zones and forklift routes, ideally through barriers or open buffer space, is essential to maintaining a safe working environment.
The same principle applies to offices and walkways. If a person can step directly from an office door into an active forklift lane, the design has already failed from a safety standpoint. Proper line marking, signage, and buffer zones should always be built into the layout to guide movement and protect staff.
Ultimately, the biggest mistake in DIY warehouse design is treating the layout as a set of individual parts rather than a single, coordinated system. Without the right experience, it’s easy to overlook how forklifts, staff, and product flow interact, and that can lead to inefficiencies, damage, and unnecessary risk.
The Cost of Poor Zoning
Poor zoning in a warehouse often leads to hidden inefficiencies that compound over time. When storage, packing, and dispatch areas are not properly separated, staff and forklifts spend far more time moving between zones than actually completing tasks. Even small inefficiencies such as taking an extra minute to move a pallet can quickly add up. Over the course of a day, that lost minute repeated across dozens of picks or put-aways can amount to half an hour or more of wasted labour.
This loss isn’t limited to time. Longer travel distances increase forklift wear and tear, raise fuel or charging costs, and reduce productivity overall. When workflows are not streamlined, trucks spend longer sitting idle at loading docks, waiting for goods to be moved from one side of the warehouse to another. In many cases, a poorly zoned layout can cause dispatch delays of 30 minutes to an hour, leading to higher delivery costs and missed time slots.
Inefficient zoning can also create confusion for staff. When receiving, picking, and packing areas overlap, it becomes harder to maintain clear organisation and stock control. Workers may have to navigate around pallets that should be stored elsewhere, or wait for forklifts to move through areas where they’re trying to pack orders. These interruptions break the flow of operations and make it difficult to maintain a consistent pace throughout the day.
By contrast, a well-zoned warehouse keeps processes moving in a logical order; from goods-in to storage, picking, staging, and dispatch. Each area serves a specific function with minimal overlap. Forklifts can operate on clear, direct routes without backtracking, and staff can work safely without crossing into traffic areas. Proper zoning not only saves time and fuel but also supports better productivity, fewer errors, and lower operating costs across the entire facility.
Testing and Refining the Layout
Before installation, CAD modelling is used to test and refine each design. This ensures the layout works in practice, not just on paper. Forklift dimensions and aisle clearances are confirmed, and the final plan is reviewed with the client.
As part of Macrack’s free warehouse design service, the team measures the warehouse, draws it in CAD, and proposes the most efficient configuration. “We’ll rework the drawing until the client’s happy, aisle spacing, heights, weights, layout, everything,” Leo explains. The result is a design that’s both practical and tailored to how the business operates.
Combining Different Racking Systems
Most warehouses operate more efficiently when multiple racking systems are combined to suit the variety of products being stored. Each product type comes with its own handling requirements, and by tailoring the mix of systems, businesses can make better use of space, improve picking speed, and create a more organised workflow.
Steel Market
For example, The Steel Market in Brendale needed to store a wide range of steel products, including sheet, pipe, and rod. Their final layout incorporated cantilever racking for long goods, heavy-duty pallet racking for bulk stock, and longspan shelving for smaller fittings and accessories. By designing these systems to work together, they were able to create a cohesive storage setup that supports both wholesale distribution and small, trade-size orders without wasting valuable floor space.
CSR
At CSR, which manufactures bricks and related materials, the storage requirements were very different. Their facility uses a mix of selective and drive-in pallet racking. Drive-in racking is ideal for storing large quantities of identical SKUs, such as pallets of packaging materials or additives used in production. Trucks and containers can be unloaded directly into the drive-in bays, keeping all like products grouped tightly together. This not only reduces travel time within the warehouse but also makes stock levels easier to monitor and replenish.
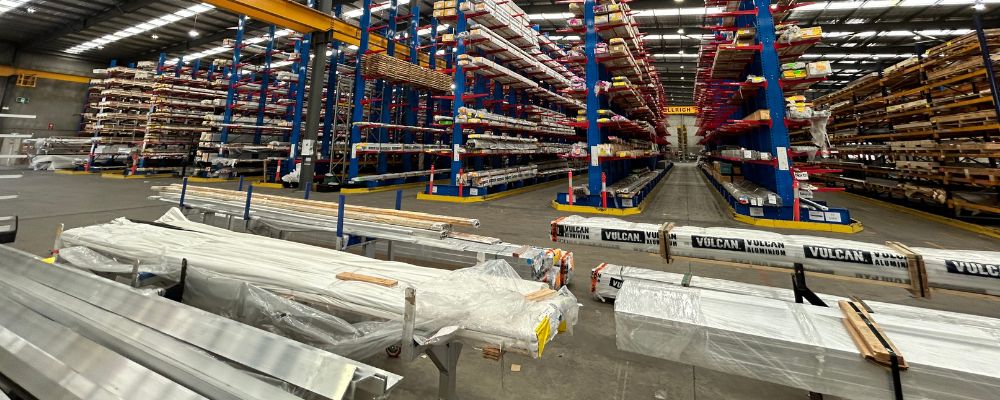
Suntex
Suntex, a manufacturer of blinds and awnings, needed a highly flexible setup to manage their large range of aluminium extrusions. They use A-frames for storing and picking smaller quantities by job or colour, paired with cantilever racks for bulk crates of extrusions ready for replenishment. Once a particular size or profile runs low, a full crate can be removed from the cantilever racking and restocked into the A-frames for daily use. The same warehouse also incorporates selective racking for packaging and hardware, ensuring every material type has a dedicated and accessible zone. To accommodate their growing production team, Suntex are planning to install a raised storage area above part of the existing warehouse, doubling their usable floor space for assembly and staging.
These examples show that an efficient warehouse rarely relies on a single type of racking. By combining systems such as selective racking, drive-in racking, cantilever racking, A-frame racking, and longspan shelving, businesses can design a storage environment that supports the specific way they work, balancing accessibility, density, and workflow for maximum productivity.
Experience That Drives Efficiency
No two warehouses are the same, and that’s why every design needs to be tailored around how a business actually works. Whether it’s improving forklift flow, increasing capacity, or planning for expansion, Macrack focuses on solutions that grow with you built for safety, efficiency, and long-term performance.
Contact Leo and the team at Macrack for a free warehouse layout design consultation on 1800 048 821 or fill out our online form today.
About Leo Kanas
Leo Kanas brings over two decades of hands-on experience in warehouse storage systems and racking design. As Project Manager and lead designer at Macrack Australia, Leo works at the intersection of engineering, layout optimisation, and customer-driven solutions. He holds qualifications in project management and industrial design, and has overseen dozens of warehouse redesigns across Australia. Leo is passionate about helping businesses unlock hidden capacity, streamline workflows, and future-proof their storage systems.
Get A Free Design And Quote
Ensure Your Warehouse Storage Solution Has A Lifetime Guarantee Contact Us Today